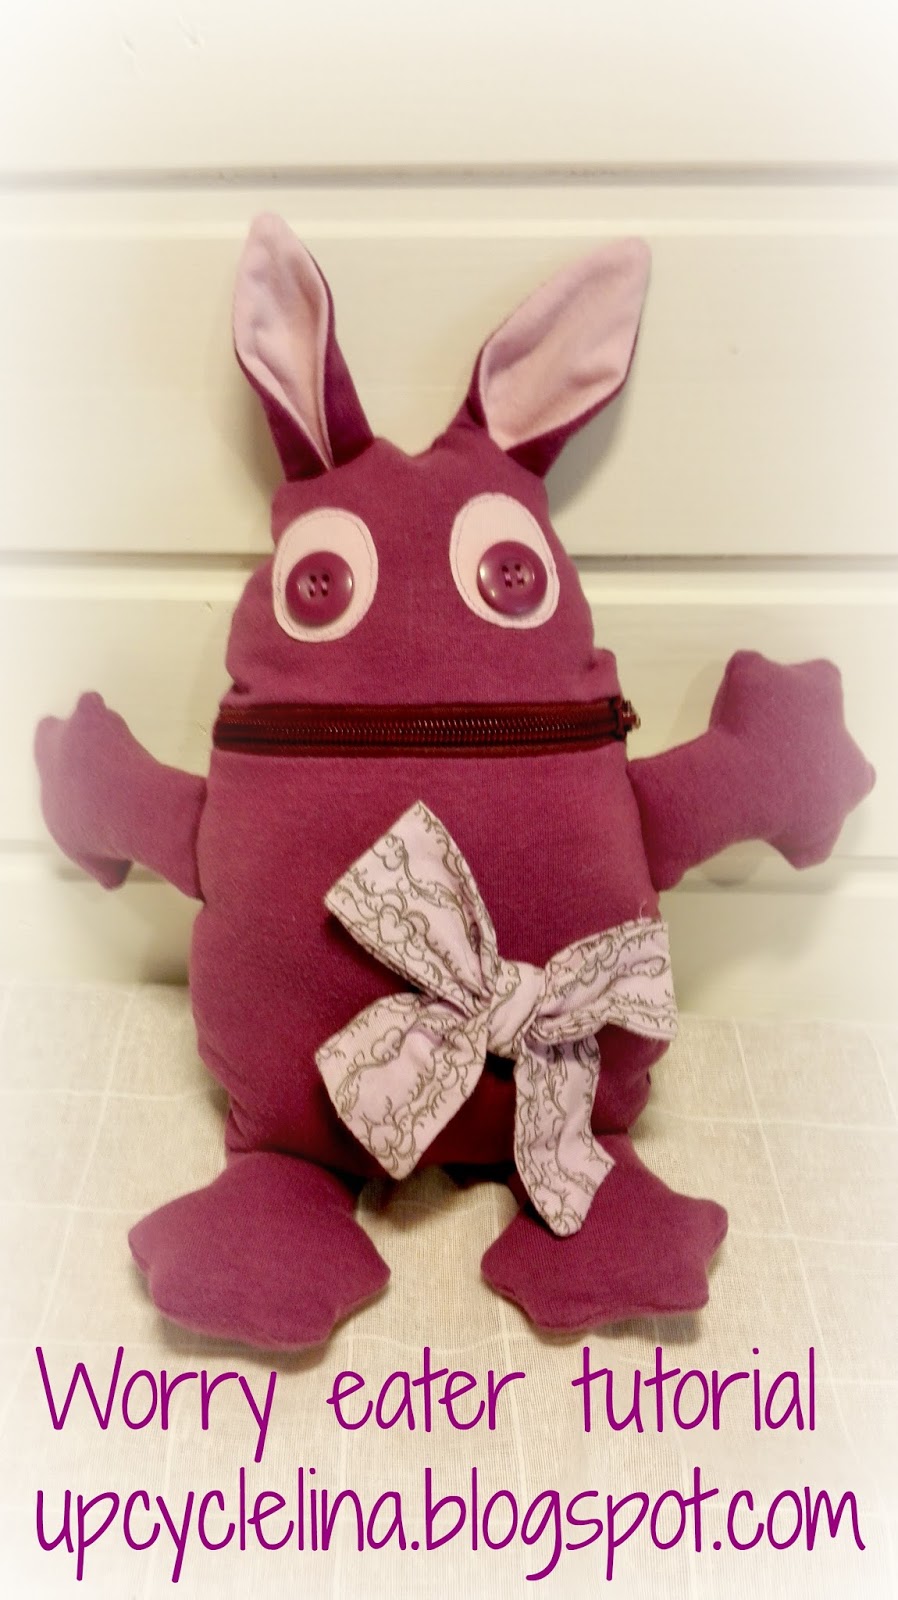
After my last post about our summer time and short break because of summer trips finally something I have actually done! I have mentioned before how Finns tend to get crazy when it becomes summer and every town and village have their own summer events and fests. Our little village is no exception, our summer event lasted whole week with casual sport events, market etc. There were also small group of volunteers who opened a season shop for that week filled with local products. Potatoes and other farm products, crafts etc. I also made something, could have made more but the time was short with holiday trips and all other duties. I decided to make worry eaters and got together eight of them.
Four are the size I made the original one (here) and four are slightly smaller because the size of the clothes I upcycled for these. They are, of course, upcycled; zips, buttons and fabric comes from old clothes. For the filling I used new cotton wool. I didn't think it would be such a good idea to use old cotton wool from old pillows. Think about the sweat and grease the pillows might have absorbed! No washing can take it out of them, so new it was instead of upcycled.
I used knit fabrics to make them nicely soft and cuddly and of course saved the extra parts from the clothes I used.
This one was a small ballerina body and I cut the front part from the body's front part with the star, placing it on the side rather than in middle. Ears and eye background are from scrap fabric, the body itself is soft jersey.
My favourite worry eater! For this I used old adult pants made out of soft velour. There is still plenty of this fabric left for many other projects, the adult pants have so much fabric for upcycling purposes! Again, the rest is from my scrap box.
Green terry hoodie with bright pink zip and wristbands turned out to something more harmonic with green zip and yellow ears and eyes. Terry is elastic, very comfortable for a toy like this. Yellow fabric is out of old baby body.
Sometimes it is some small detail that makes you happy. In this case it is the zip. I had a sweatshirt blouse with grey sleeves (the fabric in ears) and I found a zip with matching colour from my storage! I like this one too because the fabric is sturdier than jersey and gives whole more feeling to a toy than jersey.
However, jersey works great for the smaller ones. For the the pink I used sleeveless summer top in size 104. From the shirts at this size you make easily the bigger one but then you need to have sleeves for the hands and ears. The blue one is t-shirt in size 104, also the missing long sleeves made it impossible to make the bigger one. Also the fabric is 100% viscose and very soft, I doubt it would have worked well with the big one.
For these I used old baby clothes, the left one is out of pants, the right one out of a body. Even the small baby clothes make great small worry eaters!
I have to say that if (or when) I will make more worry eaters for sale I will not make the fingers and toes! It would save me easily 15 min/worry eater - at least. I sold three of these in the season shop during that week, quite well when you think that these were the only things I had for sale, the shop was open only for a week and it was in a small village, not next to a busy shopping street in a city. Right after the week I sold two more so only three left!
I also made small notes with my email and blog addresses so someone interested could take a card and maybe contact me later.
I also had an explanation what these are, what they are made of and a mention that I can make something out of old favourite clothes, great keepsake! That's why I made these cards too, easy to grab into your wallet. The box is, of course, upcycled. I got a shower gel in a pretty box, this is the cover. It was quite pretty but the surface had suffered some damage in the bathroom so I covered the edges and the bottom:
It was just right for this use!
Altogether; 8 pieces of clothes used, same amount of zips and 16 buttons, not bad! If you took a look at my working room, you wouldn't notice it though, it is still too full!
And... if you want to make your own, I have a post about making your own worry eater with full tutorial: http://upcyclelina.blogspot.fi/2016/04/worry-eater-tutorial.html
Showing posts with label toys. Show all posts
Saturday, 30 July 2016
Monday, 4 July 2016
Diy dry erase book - travelling with kids part 2
Time for another thing that is handy when travelling with kids, dry erase book! There are some to be bought of course but the selection in here isn't that great and the idea of the few available is quite educational. Not that it only matters, the kids usually like those kind of things but the books I found were the kind where the kids need someone to read the tasks and explain them. Something that doesn't work very well for kids on the backseat of the car. Also, it would be great to use the activity books we already have and select the pages the kids like. Then things got a little bit out of hand and this turned out.
I tried to explain to everyone that making something like this is pretty normal thing to do before going for a car trip, nothing weird in it, right?
In case you are wondering the same thing... I did it because:
I knew the principles; use some plastic pockets and marker that can be erased easily. Plastic pockets I knew I could get anywhere, the ones used in folders would work just fine but the marker? There are no actual dry erase markers sold in Finland. The ones sold are made to be used with their own brand of books and might get messy working with other surfaces. Thank you for the great tips by a group of crafters in Facebook! Someone actually tried those dry erase markers on other surfaces so I knew if they would work or not! I found some on eBay (of course) but didn't have time to order them there. The tips included water soluble overhead projector and white board markers. I though white board markers would be too thick for this purpose so I decided on overhead projector markers. But... there are hardly any overhead projectors nowadays so there was nothing under that name. So, if you are looking for the markers I used, look for cd/dvd markers, they are the same, just under different name.
So I had the pens for my dry erase book but then I had another problem. The folder pockets were only A4's and I needed A5. A4 is way too big for the kids to use in the car. I could have cut them half but then the book would have been positioned wrong as the A5 activity pages I have are all vertical. I also wanted the book to open horizontally rather than vertically, again the problem with small space. It would have been frustrating for the kids to use something that they have to twist and turn to turn a page. A5 and vertical pages to make it open horizontally were the things I didn't want to compromise with. I'm sure there are the right size plastic pockets available in the depth of the internet but I still didn't have that time to wait for them. Yes, I could have cut the A4 pockets to A5's by simply making them smaller but simply couldn't bring myself up doing it. Imagine the amount of plastic that would go to waste just because of dry erase books for kids to be entertained during car trip?
Then I needed the covers and I didn't have any suitable ready folders either and first I thought I would use cardboard for them. But while looking for cardboard I I found couple old kids books that were just right! And what a great idea to upcycle old books that weren't used anymore.
I torn out the pages (and left for future crafting) and added ribbons to tie the pages. I found a necklace that I don't use, never have and most likely never will, that had just perfect ribbon! It is narrow enough and sturdy enough, the ribbon is some kind of fake leather.
The other parts I kept, of course for other upcycle projects. The ribbons I glued with hot glue.
Then I had to cover the activities with plastic. I found some overhead projector sheets that I have had way over 10 years. I once bought a package of them to make stencils but only used couple back then and still had 18 left. It wouldn't be enough for two books though so I bought a roll of sticky plastic (the one used to cover school books) and used that for the rest. I don't very much like to cover paper with plastic as it isn't possible to recycle the paper anymore but I thought I would use sticky plastic to the pages that would be used again and again. The sheets would be used for the pages that would get boring after couple trips and would need to be changed.
Of course, folding overhead projector sheet half isn't that easy but luckily I had solution right on hand, Wonderclips! Just match the edges, add Wonderclips (or clothespins) and once you are sure it will stay, press.
The pages with sticky plastic I added piece of normal paper on the place where I was going to make the holes to make it last better. For the plastic sheets I used first eyelets but decided after couple pages that I don't need them and made just the holes with the hole making tool that came with the eyelets.
With the sheets I used brads to keep the paper inside still. I attached the brads right next to the paper to pin it on its place, worked very well. Loosening the brads will make it possible to change the activities easily.
I attached the brads on different places for every page so the book wouldn't become too thick. Still, using the brads for the whole book would have been impossible because of the thickness so it was actually good thing I didn't have more overhead projector sheets, using sticky plastic for some worked just fine. Don't tie the ribbons too tight, the pages won't turn if you do that.
I could have left it here, right? Leaving the covers like that when there are so many ideas out there to try? Not likely. When I saw quiet books first time my first thought was "oh wow, that must have taken ages to make!". The second time "they would be great to make but I will never have the time". The third time "they would be great to make". The fourth "my kids would love them" and small voice in my head only whispered "I will never have the time". The fifth (I have been seeing them a lot lately because once you look something in Pinterest twice you get to see it much more often) "what would I make if had time?" At this point I was saving couple pages, you know, just in case. The sixth thought "what if I had the time, what if I made time for it?" added with a loud sound in my head "don't go there!" I knew that once I started looking them with that thought in my head I would have lost the game and I would be making them some day. The seventh thought "what does it matter if it takes time, you like doing it, just one page?" and a whisper in my head "you could be doing something more sensible like sewing new clothes for the kids!".
The other voice in my head lost. Of course it did as I knew it would from the moment I saw the quiet books for the first time. Does this ever happen to you? I wanted to make something nice for the cover and while doing it, I could make it one more activity. The problem was that most quiet book pages are meant to be used together, most of them won't keep kids busy for more than a minute, at least at the age of 4 and 5. The kids around 1-2 usually like closing and opening a clip for a longer period of time, the older kids not so much. First I thought I would make a clock with turning hands, then I saw some mazes that I considered as the mazes are my kids' favourite activity pages. But then I found a page with little mouse with cheese and home from http://anna-anafe.blogspot.fi/2014/09/blog-post.html. I don't understand a word of the blog post itself but all I needed was the picture.
I tried to sew the mouse but didn't have felt, like she seemed to use so I made my mouse out of Fimo clay and hot glued the ribbon-tail.
I draw the face with black permanent marker.
It can go under the cheese, come out from the holes and go back to its home:
And I was right, the kids liked this idea very much! They like small figures, especially animals and usually figure out their own play around them and this one quiet book page entertained them alone for few kilometers. It also didn't take that long to make actually, of course figuring out where to find all the materials took more time than the making itself. But that's usually the case with my projects. The cover itself is from my old jeans and I matched the inside seam to the back of the book. Here I also attached the marker with elastic band.
The idea here is that the marker's cap will stay put under the elastic band so it wouldn't get lost in the car. I thought of adding a ribbon to the marker as well but then decided against it, it would just annoy the kids. Of course with smaller kids I would advice to tie the marker too. As the marker is water soluble I cut few fabric scraps, wet them and packed them in self-sealing plastic bag as erasers. Of course the fabric scraps I have are mainly from the fabrics I have used to make clothes for them so they were interesting itself and nicely colourful.
I sew folds to the cover so it stays put but can be removed when I want to change it so it isn
't glued. Overall, this dry erase book was great success for the kids and I could upcycle so many things here! Here is a list what you need:
I tried to explain to everyone that making something like this is pretty normal thing to do before going for a car trip, nothing weird in it, right?
In case you are wondering the same thing... I did it because:
- usual paper activity books can't be opened properly by kids without normal table, they won't stay open
- paper activity books don't have hard covers, something that would be needed especially when there is no table
- once a maze is done, it is done, no re-doing it even though the kids would like to solve them again
- markers aren't great to use in the car as there are always caps missing and chalks or wooden colours are too light if you can't press them enough, again you need table for this
- chalks or wooden colours can't be erased, something very important in the car as there are pumps and turns in the road making drawing more difficult
So I needed an activity book that is A5 (approximately), opens easily, has hard covers, activities can be done again and again, uses markers that don't lose their caps and can be erased easily. After a brainstorm and surfing in the Pinterest I thought I had everything covered. Of course, it should be something that I could make out of the materials I had on hand, great project for upcycling!
I knew the principles; use some plastic pockets and marker that can be erased easily. Plastic pockets I knew I could get anywhere, the ones used in folders would work just fine but the marker? There are no actual dry erase markers sold in Finland. The ones sold are made to be used with their own brand of books and might get messy working with other surfaces. Thank you for the great tips by a group of crafters in Facebook! Someone actually tried those dry erase markers on other surfaces so I knew if they would work or not! I found some on eBay (of course) but didn't have time to order them there. The tips included water soluble overhead projector and white board markers. I though white board markers would be too thick for this purpose so I decided on overhead projector markers. But... there are hardly any overhead projectors nowadays so there was nothing under that name. So, if you are looking for the markers I used, look for cd/dvd markers, they are the same, just under different name.
So I had the pens for my dry erase book but then I had another problem. The folder pockets were only A4's and I needed A5. A4 is way too big for the kids to use in the car. I could have cut them half but then the book would have been positioned wrong as the A5 activity pages I have are all vertical. I also wanted the book to open horizontally rather than vertically, again the problem with small space. It would have been frustrating for the kids to use something that they have to twist and turn to turn a page. A5 and vertical pages to make it open horizontally were the things I didn't want to compromise with. I'm sure there are the right size plastic pockets available in the depth of the internet but I still didn't have that time to wait for them. Yes, I could have cut the A4 pockets to A5's by simply making them smaller but simply couldn't bring myself up doing it. Imagine the amount of plastic that would go to waste just because of dry erase books for kids to be entertained during car trip?
Then I needed the covers and I didn't have any suitable ready folders either and first I thought I would use cardboard for them. But while looking for cardboard I I found couple old kids books that were just right! And what a great idea to upcycle old books that weren't used anymore.
I torn out the pages (and left for future crafting) and added ribbons to tie the pages. I found a necklace that I don't use, never have and most likely never will, that had just perfect ribbon! It is narrow enough and sturdy enough, the ribbon is some kind of fake leather.
The other parts I kept, of course for other upcycle projects. The ribbons I glued with hot glue.
Then I had to cover the activities with plastic. I found some overhead projector sheets that I have had way over 10 years. I once bought a package of them to make stencils but only used couple back then and still had 18 left. It wouldn't be enough for two books though so I bought a roll of sticky plastic (the one used to cover school books) and used that for the rest. I don't very much like to cover paper with plastic as it isn't possible to recycle the paper anymore but I thought I would use sticky plastic to the pages that would be used again and again. The sheets would be used for the pages that would get boring after couple trips and would need to be changed.
Of course, folding overhead projector sheet half isn't that easy but luckily I had solution right on hand, Wonderclips! Just match the edges, add Wonderclips (or clothespins) and once you are sure it will stay, press.
The pages with sticky plastic I added piece of normal paper on the place where I was going to make the holes to make it last better. For the plastic sheets I used first eyelets but decided after couple pages that I don't need them and made just the holes with the hole making tool that came with the eyelets.
With the sheets I used brads to keep the paper inside still. I attached the brads right next to the paper to pin it on its place, worked very well. Loosening the brads will make it possible to change the activities easily.
I attached the brads on different places for every page so the book wouldn't become too thick. Still, using the brads for the whole book would have been impossible because of the thickness so it was actually good thing I didn't have more overhead projector sheets, using sticky plastic for some worked just fine. Don't tie the ribbons too tight, the pages won't turn if you do that.
I could have left it here, right? Leaving the covers like that when there are so many ideas out there to try? Not likely. When I saw quiet books first time my first thought was "oh wow, that must have taken ages to make!". The second time "they would be great to make but I will never have the time". The third time "they would be great to make". The fourth "my kids would love them" and small voice in my head only whispered "I will never have the time". The fifth (I have been seeing them a lot lately because once you look something in Pinterest twice you get to see it much more often) "what would I make if had time?" At this point I was saving couple pages, you know, just in case. The sixth thought "what if I had the time, what if I made time for it?" added with a loud sound in my head "don't go there!" I knew that once I started looking them with that thought in my head I would have lost the game and I would be making them some day. The seventh thought "what does it matter if it takes time, you like doing it, just one page?" and a whisper in my head "you could be doing something more sensible like sewing new clothes for the kids!".
The other voice in my head lost. Of course it did as I knew it would from the moment I saw the quiet books for the first time. Does this ever happen to you? I wanted to make something nice for the cover and while doing it, I could make it one more activity. The problem was that most quiet book pages are meant to be used together, most of them won't keep kids busy for more than a minute, at least at the age of 4 and 5. The kids around 1-2 usually like closing and opening a clip for a longer period of time, the older kids not so much. First I thought I would make a clock with turning hands, then I saw some mazes that I considered as the mazes are my kids' favourite activity pages. But then I found a page with little mouse with cheese and home from http://anna-anafe.blogspot.fi/2014/09/blog-post.html. I don't understand a word of the blog post itself but all I needed was the picture.
I tried to sew the mouse but didn't have felt, like she seemed to use so I made my mouse out of Fimo clay and hot glued the ribbon-tail.
I draw the face with black permanent marker.
It can go under the cheese, come out from the holes and go back to its home:
As you can see, I have sewn around the holes, this is to prevent stretching. The nest's top has also framilon-elastic band to make it, well, elastic, and to keep the mouse inside when not played.
And I was right, the kids liked this idea very much! They like small figures, especially animals and usually figure out their own play around them and this one quiet book page entertained them alone for few kilometers. It also didn't take that long to make actually, of course figuring out where to find all the materials took more time than the making itself. But that's usually the case with my projects. The cover itself is from my old jeans and I matched the inside seam to the back of the book. Here I also attached the marker with elastic band.
The idea here is that the marker's cap will stay put under the elastic band so it wouldn't get lost in the car. I thought of adding a ribbon to the marker as well but then decided against it, it would just annoy the kids. Of course with smaller kids I would advice to tie the marker too. As the marker is water soluble I cut few fabric scraps, wet them and packed them in self-sealing plastic bag as erasers. Of course the fabric scraps I have are mainly from the fabrics I have used to make clothes for them so they were interesting itself and nicely colourful.
I sew folds to the cover so it stays put but can be removed when I want to change it so it isn
't glued. Overall, this dry erase book was great success for the kids and I could upcycle so many things here! Here is a list what you need:
- old book
- overhead projector sheets/plastic folds/sticky plastic
- activity books or print activity pages, there are loads available
- cd/dvd marker, water soluble!
- fabric scraps
- self-sealing plastic bag
- old jeans
- yellow felt
- elastic band (couple centimeters)
- ribbon for tail
- fabric scrap for the nest
- framilon-elastic band for the nest's top
- Fimo clay or similar
- hot glue gun
Very fun project to do, something that I liked to make and the kids liked to use! Proved again that I should never throw anything away! And what is more, the books did keep the kids occupied quite long. I'm happy.
Friday, 29 April 2016
Worry eater tutorial (upcycled)
I mentioned worry eater in my first post so I think it is time for this blog's first how to. Worry eater is a plush toy with big mouth to eat all the worries kids (and maybe older ones) have. The idea comes from Germany where it goes under name ' Sorgenfresser'. Here is a tutorial to sew one and also tips to draw a pattern for your liking.
This is what I used:
Sweatshirt-dress, t-shirt and zipper from old pants. You can use almost any fabric for worry eater but I think it is best to use fabric that is soft and somewhat elastic to make it nice and cuddly. The sweatshirt-dress has a stubborn stain that won't come off, t-shirt's picture is too faded to be used so they are best used for upcycling. I used also the bowtie and the buttons so overall very good project.
I started by cutting the dress in parts and ironing them, I also removed the buttons and the bowtie and sew a 'lock' on the other end of the zip so it won't open in the wrong end. The t-shirt was used for the eye, mouth and the ears.
Then I placed the zip, bowtie and buttons on a sheet of paper (a4) and draw the body of the worry eater based on those measurements. I decided what kind of ears I would make and also the paws. Here is what I came up with:
Only one pattern for the paws as I used the same one to make all four paws.
After having the outlines for the worry eater I decided the place for the mouth (blue arrow in the picture) and the size of its mouth.
I then copied the mouth to transparent paper and cut two pieces for it:
The upper part is 1cm higher than the lower part as the zip will be needing its own space. Now the patterns are ready.
For the back part you can use the pattern you drew first and you can use the same for the front as well, just cut it half along the line where you intend the zip to come. So the front patterns should look like this (add the seam allowances):
Cut 8 pieces for the paws and two for the ears from sweatshirt and also two for the ears from t-shirt. Cut the eyes from the t-shirt as well and you are ready to start sewing. First attach the eyes and in this case, the bow tie. Whatever decorations you might use, attach them now as it is easiest. Then start with the mouth. Attach the top parts together right ways facing (head and mouth) with zip between the two:
After sewing it should look like this:
Then do the same for the lower parts. Attach lower part of the body and lower part of the mouth together, again, zip in between and remove the upper parts out of the way.
Now the backside should look like this:
Then close the mouth but only partly leaving a gap on the bottom big enough to be able to turn the worry eater around once it is ready. Start sewing from the bottom and do it in two parts remembering to leave the gap. So start from the left on the bottom and sew as far as you can get, then do the same on the right side. You can't sew all the way up because of the zip, like this:
That's fine, you can leave small gap there, you will be closing it later.
Take your paw parts and ears and sew them together, right ways facing, make cuts to seam allowances and narrow down the seam allowances to something like 3-5mm.
On the left you can see what was left after narrowing down the seam allowances, pictured because I used it as part of the filling. No need to throw it away if you can use it right away. Turn the parts, pay special attention to corners and bents to give the right form for the parts. Fill them with whatever you have in hand, I used cotton wool added with those small pieces of fabric. If you are like me and don't throw anything away here is a good place to use all those too tiny scraps of fabric. Attach the ears and paws
It looks a bit grumpy like this but let it stay that way and attach the back side, right ways facing of course and leave the zip open for couple centimeters, you will be needing that later when you turn the whole thing around. Use pins even if you don't usually. You have to stretch the back part a bit as it needs to cover all those lumpy parts too and it is very easy to misplace it. Better use them than having to rip it later because it moved while sewing.
Sew around and now you will be closing those two gaps around the zip as well with that one seam, like this:
Now it is actually almost ready! Just put your hand through that gap you left on its mouth, through the zip and start pulling it to the right side.
If you left big enough gap on its mouth you will have it done pretty easily. Now, fill the worry eater with cotton wool through its mouth:
Close the mouth completely.
And push the mouth inside your new worry eater.
You are done!
Let's take a look back. This was where it all started:
And this is what those unusable clothes became:
- Elina

This is what I used:
Sweatshirt-dress, t-shirt and zipper from old pants. You can use almost any fabric for worry eater but I think it is best to use fabric that is soft and somewhat elastic to make it nice and cuddly. The sweatshirt-dress has a stubborn stain that won't come off, t-shirt's picture is too faded to be used so they are best used for upcycling. I used also the bowtie and the buttons so overall very good project.
I started by cutting the dress in parts and ironing them, I also removed the buttons and the bowtie and sew a 'lock' on the other end of the zip so it won't open in the wrong end. The t-shirt was used for the eye, mouth and the ears.
Then I placed the zip, bowtie and buttons on a sheet of paper (a4) and draw the body of the worry eater based on those measurements. I decided what kind of ears I would make and also the paws. Here is what I came up with:
Only one pattern for the paws as I used the same one to make all four paws.
After having the outlines for the worry eater I decided the place for the mouth (blue arrow in the picture) and the size of its mouth.
I then copied the mouth to transparent paper and cut two pieces for it:
The upper part is 1cm higher than the lower part as the zip will be needing its own space. Now the patterns are ready.
For the back part you can use the pattern you drew first and you can use the same for the front as well, just cut it half along the line where you intend the zip to come. So the front patterns should look like this (add the seam allowances):
Cut 8 pieces for the paws and two for the ears from sweatshirt and also two for the ears from t-shirt. Cut the eyes from the t-shirt as well and you are ready to start sewing. First attach the eyes and in this case, the bow tie. Whatever decorations you might use, attach them now as it is easiest. Then start with the mouth. Attach the top parts together right ways facing (head and mouth) with zip between the two:
After sewing it should look like this:
Then do the same for the lower parts. Attach lower part of the body and lower part of the mouth together, again, zip in between and remove the upper parts out of the way.
Now the backside should look like this:
Then close the mouth but only partly leaving a gap on the bottom big enough to be able to turn the worry eater around once it is ready. Start sewing from the bottom and do it in two parts remembering to leave the gap. So start from the left on the bottom and sew as far as you can get, then do the same on the right side. You can't sew all the way up because of the zip, like this:
That's fine, you can leave small gap there, you will be closing it later.
Take your paw parts and ears and sew them together, right ways facing, make cuts to seam allowances and narrow down the seam allowances to something like 3-5mm.
On the left you can see what was left after narrowing down the seam allowances, pictured because I used it as part of the filling. No need to throw it away if you can use it right away. Turn the parts, pay special attention to corners and bents to give the right form for the parts. Fill them with whatever you have in hand, I used cotton wool added with those small pieces of fabric. If you are like me and don't throw anything away here is a good place to use all those too tiny scraps of fabric. Attach the ears and paws
It looks a bit grumpy like this but let it stay that way and attach the back side, right ways facing of course and leave the zip open for couple centimeters, you will be needing that later when you turn the whole thing around. Use pins even if you don't usually. You have to stretch the back part a bit as it needs to cover all those lumpy parts too and it is very easy to misplace it. Better use them than having to rip it later because it moved while sewing.
Sew around and now you will be closing those two gaps around the zip as well with that one seam, like this:
Now it is actually almost ready! Just put your hand through that gap you left on its mouth, through the zip and start pulling it to the right side.
If you left big enough gap on its mouth you will have it done pretty easily. Now, fill the worry eater with cotton wool through its mouth:
Close the mouth completely.
And push the mouth inside your new worry eater.
You are done!
Let's take a look back. This was where it all started:
And this is what those unusable clothes became:
- Elina
Tunnisteet:
for kids,
toys,
tutorial,
upcycled clothing
Subscribe to:
Posts (Atom)