Wednesday 28 September 2016

Some beautiful landscape

We had quite a drive last weekend - four hours drive, twice of course. Dry erase books were in good use again!

On Sunday the trip back seemed quite long, we only stopped to have ice creams and coffee and then were almost at home when it was apparent that the kids just couldn't sit still for the last half an hour. We were in middle of nowhere, definitely no play ground for the kids or coffee for the adults on fancy service station.

But what you have in middle of nowhere is sometimes better, much better than those service stations that look the same all over the country. No surprises when you stop on one near home or after driving that four hours.

There is one great looking bridge that half an hour from our home and close to that bridge we spotted sign for parking place. Those parking places usually look like big bus stops but every now and then there is something more. This was one of those. First we had to turn right and had to drive some hundreds of meters back.

There was nothing fancy just broken, decayed table. But the place! You could see the cars going over the bridge but they didn't see us. We could even let our dog out without leash, something he definitely liked.

Juice boxes for the kids, viewing the landscape for adults. What else do you need for a short stop? Maybe the coffee though...


After that the last half an hour was much easier than without the stop. It was well worth it. :)

Sunday 25 September 2016

Baby gifts

Finally for a reason why in the last post I said that I have had only something small here in the blog. At least those feel small to me; the belt didn't take that long, the curtain was needed and fun but nothing special in it, the top for my daughter was just basic sewing etc. No tutorials, no interesting upcycles... That's how it feels to me, I have set some standards for myself and all of these are below those standards. Maybe not the belt, that was actually quite cool to understand you can make one yourself!

Our kids got a new cousin in August and now that they are a bit older and I actually have some sewing time I almost lost my head when thinking about what to make as a baby gift! What I ended up is less than half of what I was thinking of!

I mean, there are so many things you can sew for a baby and all of them are just way too cute to miss. And then all those little clothes! You don't need to think if the baby wants to wear them as you have to when the kids have an opinion of themselves. Just know something about how the mum feels about baby clothing (yeah, usually it is still a mum who decides about this...) and you are good to go.

As a new baby present I ended up doing this:


Car seat bag for an autumn baby so she can travel comfortably in a car during the cold weather. My daughter's Baby Born-doll is showing how it works; put a baby inside, close the seat belts, zip the bag. During the winter the babies need warm clothes and that means also thick clothes, especially when you compare to the size of the baby. It's more comfortable when you can close the seat belts over less clothing than over thick ones.

Also you can open this easily in the car when it is warm enough as well as for example in the grocery store. You don't want to wake up sleeping baby, at least if you have some grocery shopping to be done. So, just take your baby in her car seat, open the car seat bag and she can continue her sleeping undisturbed.

I didn't know what kind of car seat the family had and obviously couldn't ask so I made it fit to any car seat. Just asked some measurements from other parents and made it easy to use even with 5-point seat belts. It needed some thinking over but I'm quite happy with the result. There will be full car seat bag tutorial later on.

Good thing with the bag is that you can use it just like any other sleeping bag in a pram with belts too, it should work with those as well. I hope the family finds lots of use for this one.

The little girl got a name yesterday and was baptized, also an occasion to bring gifts. Naturally, self made through and through from us.


Worry eater of course, small baby boots, self made card and because they were hard to wrap self made present bag too. For the boots I made pattern myself out of the ones our daughter got as a baby. Also tutorial for those coming up and I try to make printable pattern too but we will see.

These were fun to make and even though they aren't really upcycles (except the worry eater of course), I will share the tutorials here too. I wish I had known how easy it is to make cool baby accessories myself when our kids were babies.

The new families often have tight budget, new baby needs so many things and here are couple things you can make yourself and with very low budget if you want to. Just upcycle some fabrics you already have and you have something that costs tens of euros in the shops! I will share some tips for doing this when making the tutorials.

Sunday 18 September 2016

Bed curtain out of old duvet cover

I have only something "small" to show to you this time. Last week I made a belt and this is another week that I show to you only "something small". The reason is that I have been making something secretive that I can only put here after next week. So for now to that something small - or is it actually?

Our kids share a room at the moment and they both have loft beds. There is no point in having separate rooms now that they are this young, the company of the other gives a feeling of security. But who wouldn't want to have some privacy every now and then? Daughter is preschooler now and wants to be alone every now and then. Also to calm down the bed time I thought that some kind of curtains would be good.

Then I had an idea, then another one, then I asked my kids and had to change all the plans. Then I was looking for a fabric that would suit, found something else and changed everything again. Eventually I had one ready.


First idea was to make a bed curtain out of nice fabric, or maybe just buy curtains, especially when I calculated how much the fabric would cost. It is insane really, you can buy curtains and bed sheets for cheaper than just fabric!

Then I asked what the kids would like and the ideas were so interestingly weird that I decided not to follow them as they were. But that gave me an idea, how about if they could design their own curtains? I found a fabric that would almost ask for drawing! I bought fabric pens but only my daughter wanted to draw anything and as drawing into fabric isn't as easy as on the paper this is what she came up with:


On top left curtain there is a sun, like any drawing should have. Under it grass and worm (that long pink line) and inside the circle small pond with another worm, some grass and a carrot. She said that she will draw other vegetables there as it is a vegetable patch but we will see.

So the drawing wasn't fun and also the pens were quite light, some stronger colours would probably have been good. Then they found my scrap fabric box! And after careful planning the result looked like this:


My daughter chose the pictures, my job was to cut them and sew them, all the positions are hers. If you ask her what there is you will probably get a very long tale with fairies, ponies, pandas and hedgehogs somehow connected to the vegetable patch. It isn't quite what I had in mind but it is what she wanted and that's what matters. Also she coloured one piece:


My idea was that this side would be visible to the room but of course she wanted to see her own story from her bed so we had another problem as the backside wasn't that pretty to look at. I searched my fabric storage and couldn't find any. Then I remembered that there was one duvet cover that used to be her favourite before getting bigger duvet and is now too small.

The duvet cover was a bit too small but being duvet cover it had co-ordinating fabric on the other side that I could use. Now I remembered why I don't like sewing curtains. There simply isn't big enough table to lay the fabric flat and no matter how carefully you measure the result is something that is close enough, not precisely. Even if you cut them along straight grain, you never know if the other side is few centimetres longer than the other. And I had two fabrics to be measured and with the duvet cover I had to think how to cut it to make it cover the other fabric.

I knew I had to put it on the floor but how to make it stay still so I could fit the duvet cover on it? I taped it on the floor:


Now it would stay still and it was much easier to measure it and see what would work and what not. I think I will use that again when working with bigger fabrics...

The other side is "mum-friendly" and the other side designed by the kid herself. Both are happy. :)


The curtain is hanging next to her bed with curtain wire, like this (pic not by me):

I have another one on the making for my son but not ready yet, will show it too once it is ready.

Another small thing that I made is this:


Last week we got info from school that the kids would have photo shooting for school pictures on this Monday. Naturally, there is nothing good enough to wear. I say no to all characters in pictures, so no Frozen or My little pony, thank you very much.

I have had this cat fabric for a while now and good I had, I could make a shirt for the photo shooting as it was the only fabric that was big enough to make a shirt! I used most of my fabric storage for the outfits shown in this post and haven't bought any since. I know many dressmakers have room full of fabrics but I only buy when I know what I'm going to make out of it - or if it is really, really cheap and I can think of something I can use it to. Not very good thing with few day notices...

The shirt covered but how about the pants? Not a chance that anything in the closet would do. Remember the pants in How to patch knees post? Yep, they all look like that. And now some of the patches have holes in them, as have both of the new leggings that I just made for her. Or at least they look very worn out. She likes to play on the floor on her knees and that's the result.

I tried to look for matching fabric but that's easier said than done! I looked all my shirts that were in my to be upcycled - box and everything but nothing would match!


Close, but not enough. Luckily we had business to the city anyway so I could buy new pants for her. Why not use some of the jeans from the closet that are practically unused? She doesn't want to wear them. :D Leggings are the only pants she accepts...

Good thing was that once I started making the shirt, it was smooth sailing. I copied the pattern from old shirt, just roughly draw the parts on pattern paper, measured a bit that it made any sense and all the parts fit so well together that I was actually surprised. I like the collar part, something different. In the single photos most that is showing is usually just the collar (they do group pictures too and that's a different thing, that's why I wanted new pants too) anyway. The model is very easy to sew too, the sleeve is something close to raglan forming part of the collar so no fitting the sleeve on the armhole. I think I will make a pattern with the same collar for my son too. The boys' clothing are seriously lacking the details overall and I'm always happy when I can find something new.

Now having arms crossed that she keeps her clothes clean until the photo shooting... She goes to preschool tomorrow with an advice not to be on her knees before the photo shooting. What do you think, will she remember? :D

Wednesday 14 September 2016

About compost


It is this time of the year again, fallen leaves everywhere. We have few birches, one maple tree and one larch, the kind that drops its needles before winter. Not to mention some willows and other bushes. So there are more than enough leaves to rake! I thought it would be good idea to give you a glimpse to our backyard - by showing our compost system.

First I have to say that even though I like to upcycle and recycle as much as I can, I'm not a saint. I buy plastic bags way too often, we eat meat, we have a car, we have electric heating system etc. Overall usual family with usual things, even though I dare say we produce much less trash than some families. Anyway, there is one thing that is taken care of almost all the time and that is the compost.

That is also because we actually use the soil that comes out of it on our vegetable patch. It is so good for the vegetables that there is no sense in NOT using it. And of course, it's fully organic. Doesn't got a penny either. Our garden has some flowers but very few and that's only because the previous owner had planted them. We have moved some, removed some but left few that are easiest to take care of. Instead our small garden is full with vegetable patch, berry bushes and apple trees. When I say full, it means that there isn't really space for more plants but there is of course space for other things you need the garden for. Trampoline for the kids, barbeque etc. Just so that you don't think of some fully grown garden where you walk only under the apple trees or something. :D

The vegetable patches are more of a hobby of my husband, he likes to take care of it. Build new things, try new vegetables, things like that. We had some chili growing outside too this year, mad to do it here without greenhouse really and we didn't get really any. Maybe next year?

He also works with plants, sort of. He works for Naturvention (new Finnish company making active green walls that clean the indoor air, check it, it's really new and interesting innovation) and he sometimes brings soil home from work.


It is good combined with the compost. Naturvention buys the plants in pots with soil but the green walls don't have any soil so even the roots clean the air instead of producing "allergifying" microbes. Very clean, very fresh. The soil is washed out of the plants and is of course taken to be composted. Of course, if someone needs it, they can bring it home. That only makes sense, why take good soil to be composted and packed to plastic bags (again!) if you can use it right away? With this and our compost we hardly need to buy any soil.

Back to our compost. The process has three steps.

1. warm compost


Also known as "food compost" where all the leftover food goes. Potato and onion peels, leftover fruit parts etc. Also the leftover food goes here. If it has to be thrown away, it is at least doing good job here!

This compost stays warm also during cold weather. It is just a ball of plastic but the process of composting keeps it warm. It only freezes when it is actually winter -15-20 degrees Celsius but starts working again when the weather gets warmer.

When the warm compost is full it is emptied and becomes step 2.

2. Leaf compost/step 2 compost


As you can see, there are leaves, grass and branches. This is the place where all the organic garden waste goes. It doesn't smell or attract rats or birds so it can be composted just like this. It also composts pretty fast, faster than food waste anyway. The compost is like enormous lasagne; garden waste and stuff from food compost are in layers. Doesn't smell as the garden waste keeps it quite dry and the garden waste composts faster when the food compost moisturizes it.

Now it is best left alone, just let the nature do its job. Takes year or two before it is fully composted.

3. Fully composted soil

Like this:


This was before a pile like that in the previous photo but is now pure soil that can be used in the garden just as it is. When this pile is used, we can empty the food compost here and the circle starts again from the beginning.


How about you, do you own a compost, have thought of getting one, don't have a place for one or just have never gotten around getting one?

Sunday 11 September 2016

DIY Belt

I have noticed that I have some funny ideas what you can sew and what you just have to buy. Sometimes they don't make any sense. For example I just ordered pile of fabrics to make new outdoor clothes for kids without any hesitation that I couldn't make them. But I have never actually considered making myself a belt. Why? I have absolutely no idea, it is just one of those things that you get so used to buying that you never think twice of it.

How did I end up making one now? One word: need. I needed new belt and I knew what they would cost in the shops, also I didn't want to go to city just to buy one. So I re-thought my ideas about making belts and simply did one. Just in case you have had the same weird idea, here is a complete tutorial how to make a belt. You don't even need any fancy or expensive tools!

You need:

fabric for the belt approximately 10 cm x 150 cm (depending the size you want the belt to be)
fusible interfacing equal amount
buckle
4 eyelets with parts to fasten them (usually come with the eyelets)
hammer
scrap wood


First choose your fabric. Of course recycled fabric works well here; table cloths and curtains are usually bit stronger fabric and will make beautiful belts too. I recommend not to use anything too light but it doesn't have to be very heavy either as you will support it with fusible interfacing. I used old, cotton table cloth.

Then you of course need the buckle. Where do you get them for free? From old belts of course! If you don't have any, go to second hand store and you are bound to find one for cheap. Or ask your friends, usually someone has broken or too small belts which you can break and take the buckle. Nothing breaks those metallic ones, usually it is the fabric/leather that suffers the time first. Also if you find a belt from second hand store with beautiful buckle but the belt is too small/big, just buy it and re-make it!

I had mine from a belt that I bought together with pants. The pants I have discarded long time ago but luckily I kept the belt. The belt is twined and not very usable as it stretches in use so I cut the buckle out.


Did I throw away rest of the belt? Of course not, you never know when you need it...

Measure the length of the belt and add about 20 cm extra + seam allowances. I added 3 cm to other end and 4 cm to other end. Then check the width you want to use. I recommend making as wide belt as possible. I took the jeans I was going to use it with and measured from there. I ended up cutting 7 cm + seam allowance wide.

Then cut the fusible interfacing to cover the whole belt, minus the seam allowances. Iron it on.


I wish I had a press to do that, it would be so much faster and shoulder friendly than with just an iron!

Iron the long edges turning the seam allowances in and also the other end of the belt (the one with 3 cm seam allowance).


Fold in half, iron.


As you can see, other end is folded in, other end is raw. The raw end (with 4 cm seam allowance) is the one that will be attached to the buckle so no need to fold it just now. Stitch around.

Next step are the eyelets. Here are the tools for this step:


Scrap wood is just working surface, it doesn't matter what you use, just make sure it won't be needed because hammering the eyelets on their places will cause marks on the wood.

Fold the fabric around the buckle and press with your fingers so you can see where the fabric folds:


See the red circle? That's marking the spot I marked for my first eyelet. It is on second fold covering the buckle and the eyelet here is needed so that part of the buckle is able to come through. Like this:


The package of eyelets I had, said that you could make the hole with the eyelet itself by hammering it on the fabric:


My fabric with double interfacing inside was too hard for it and all that I managed to make was a mark. But I used that mark to cut the hole with scissors.


See how I have drawn small crosses inside the circles? That's how I cut the holes. Be very careful, the hole has to be tight, if it is too big, the eyelet won't stay and the fabric will start fraying in use. It isn't even matter of millimeters, it is a matter of parts of millimeters between success and complete failure. Use the smallest scissors you have got. BE VERY CAREFUL!

Cut and try if the eyelet goes through, if it goes through there is no need to cut more, if not, just very careful small snip and try again.

Here too eyelets are through and you can see hole for the third one.


Add the other part of the eyelet:


Place the lower fastening tool under the eyelet and the whole thing on your scrap wood. Place the taller fastening tool on top of it all:


Start hammering. It won't go with one or two hits (of course you might have more muscles than I have, then it might), just try it and see if the top part of the eyelet is already bent enough to keep the eyelet still. Try pulling it and turning it to see if it is completely fastened. If it is proceed to the next step, if not, hammer some more.

Fasten the buckle:


Now your diy belt is almost ready. It can even be ready if you don't mind part of the belt hanging or you made it just the right length. If not, make a loop for the end of the belt:


Stitch and fasten to its place. First measure where you want it to be by closing your belt:


Stitch.


Ready!


I try to think new ways to upcycle fabric and this belt was definitely one! It would be nice to hear if you have any no-reason ideas what you can't make yourself? Have you overcome them or are they just in planning - if doable at all?

Wednesday 7 September 2016

Harvest time - nearfood from own garden?

Yes, if we were lucky. Due to rainy and cold summer we aren't that lucky though but at least we got something!

This post is going to be rather long and only about the harvest. If you came here to look for craft tutorials and upcycling tips feel free to check the categories and come back on Sunday evening, I will have new tutorial for you then.

With this and the last post I have also started new publishing schedule. The idea is to publish tutorial or something DIY/crafty on Sundays and something else upcycling/ecologic or frugal related on Wednesdays. Now that I have written it here, I have to stick to it. :D

Now to our garden. We live in our own house with smallish yard and have a vegetable patch, apple trees and some berry bushes. The yard could be bigger though as there is so much other things that would be nice to grow but won't have space for them. And what is more ecological than growing your own food?

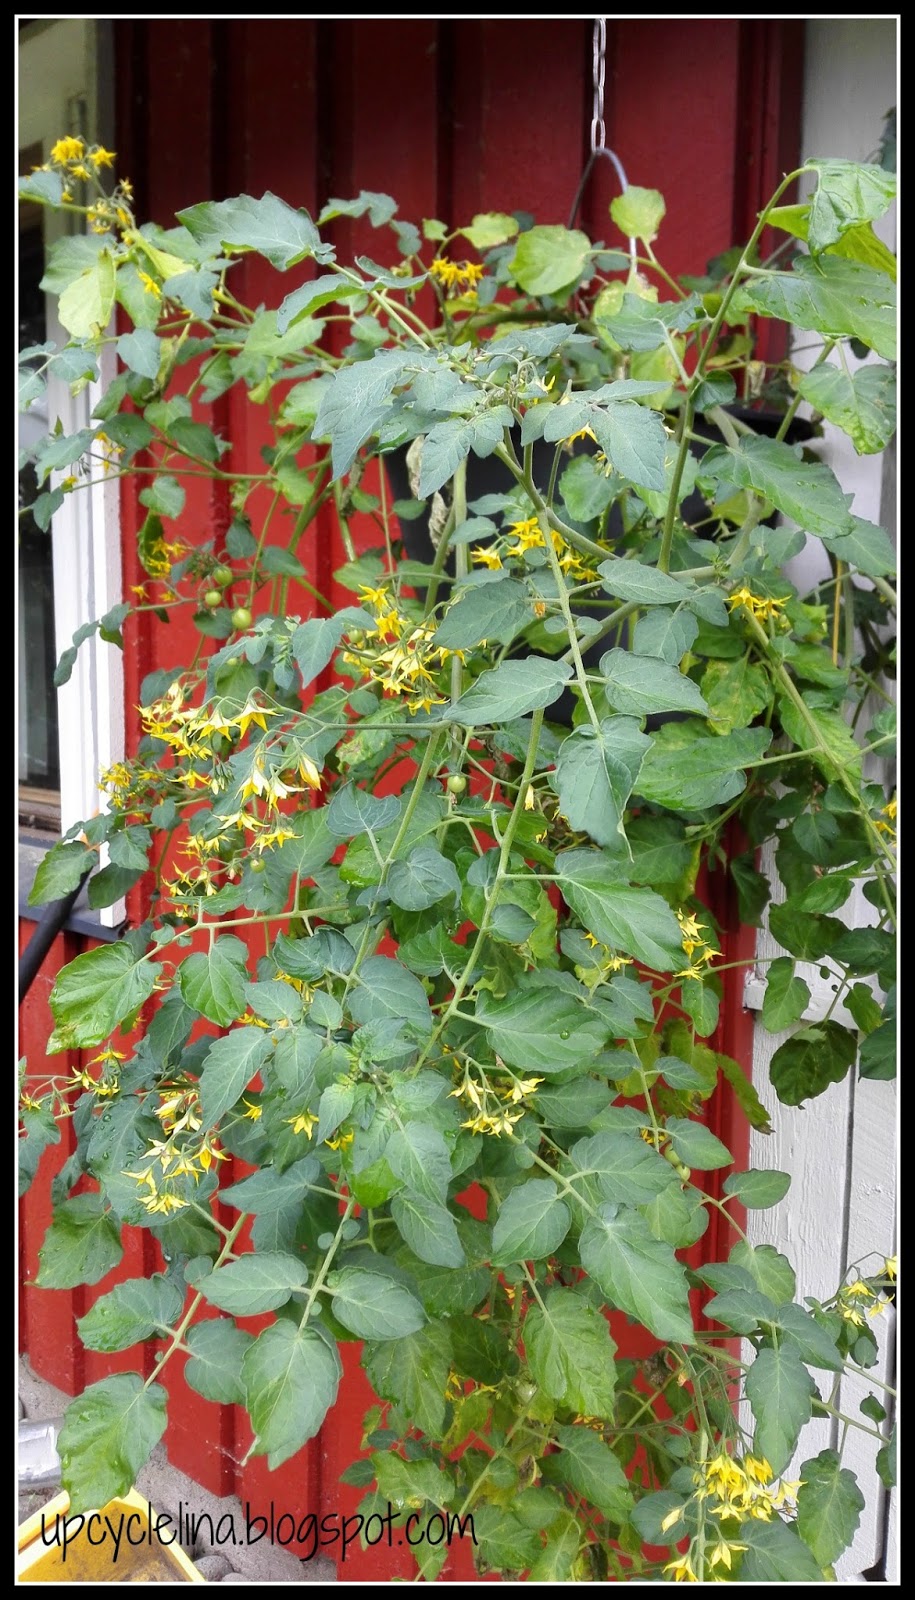
The summer started out promising; tomatoes, paprikas and chilis started growing nicely.


There were rather many paprikas, only two plants but each of them held 3-4 paprikas! As you can see from the picture they were quite big too. But... they never turned yellow or red but instead fell to the ground raw and rotten. From the tomatoes we were able to eat some as you can see in the pic above, they are yellow just as they were supposed to be. But there would have been so much more... Then this happened:


Storm. The tomatoes were growing in the buckets and they were on a table when the storm arrived here. The other plant (on right) survived and continued growing. But before actually being able to harvest anything they looked like this:


The temperature dropped below zero during the night before last. The tomatoes didn't like it very much...

With cucumbers we had more luck! Even though they had a rough start. My husband pre-grew four plants inside in pots and move them outside when it was warm enough. They were covered with some kind of veil but still the sun light was too harsh for them. Only one plant survived and three new cucumber seeds were planted on the vegetable patch. That one plant that survived went crazy after a while and all alone produced half kilograms of cucumbers!


By that time also the three others that were planted straight outside without pre-growing had started to bloom and grow new cucumbers:


Last week we harvested rest of the cucumbers with a happy result:


Almost two kilos! We thought that the cucumbers wouldn't make it this far so we bought some from the shop and made pickled cucumbers already in August:


So what to do with two kilos more? Our cellar isn't reachable at the moment and the fridge is quite full. Luckily my husband's father stopped by and he took the cucumbers and is going to pickle them, good use for them!

Then we also had peas:


None of these were preserved though,they were all eaten right from the vegetable patch by our kids.

Beans have usually had a good harvest too and last year I froze some of them. The beans aren't that picky and usually grow rather well but this year they refused to start climbing and instead grew more or less horizontally even I tried to help them up.


The harvest wasn't that big, enough for couple meals. I like to boil the beans in salty water, pour the water away, crunch garlic on top of them, some salt if needed and butter. Then I stir it a minute or two so that the butter melts and the garlic starts to smell. Goes well with a good steak!

Like I said, we have some berry bushes; raspberries, red wineberries, black wineberries and few strawberries. The strawberries got cold in the beginning of the summer and never even bloomed. Raspberries were good this year, I think I picked something like 4 liters and that's above all that was eaten right from the bush by our daughter!


I used some for my birthday cake but almost all of them I used for jam. I made bought blueberry/raspberry jam and just raspberry jam. Much better than anything you can buy from the shop!

The red wineberries is another sad story. The bush was full of raw berries when we went for a holiday trip and when we came back this was what we saw:


Nothing. Only couple berries here and there, no raw ones, no ripe ones, nothing. I have no idea what happened to that. Must have been quite a flock of birds to do that! Not to mention that the ones on our neighbor's yard were untouched. I even thought if someone had come and picked them but who would do that? I'm not worried about the berries that much, we have couple places were there are more than enough and we could pick all that we need but it would still be nice to know what happened to them.

Black wineberries:


We use wine berries just for making juice with steaming method. The steamed juice could be kept just in a fridge but not all of that fits in so we froze it. We made a lot of juice this year, must be tens of liters and it is concentrated so it will easily last over the winter without any need to buy juice from the shop.

Then there were of course some potatoes and carrots:


Garlics are still growing:


Pumpkin on the making:


This pumpkin is supposed to grow huge but I strongly suspect it will make it.

Couple brave chilis too:


That was from our garden but then there is the forest full of berries and mushrooms! We have picked some blueberries, even more lingonberries and found quite an amount of chanterelles:


All in all. Not that bad! We also bought strawberries so there are some liters of those in the freezer and I already made apple jam out of the apples that were blown away from the trees due to the storm mentioned above, also frozen now. Here is a small list:

- berry juice, tens of liters (frozen)
- strawberries, bought but from nearby (frozen)
- blue berries (couple liters, frozen)
- apple jam (few liters, frozen)
- chanterelles (for few meals, frozen)
- lingonberries (crushed, preserved in their own juice in fridge, few liters)
- pickled cucumbers (one shelf in the fridge full of them)
- raspberry and blueberry jams (couple liters)

Potatoes, carrots, beans and peas eaten. Garlics still waiting.

When you look at it like that, it isn't that bad at all! Did you grow your own food this summer?